The holidays are quickly approaching, so I've been brainstorming ideas for recipes to try out this year. Last Christmas, I made pumpkin cupcakes with eggnog frosting. I'm considering making them for Thanksgiving this year. With my recent ventures in making caramel apples, I've also gained some confidence in the confectionery area outside of rumballs and fudge. So here is what I'm planning to make (and hopefully share here) in the next couple of months...
Thanksgiving
Pumpkin cupcakes with whipped spice frosting
Roasted turkey (oooh)
I may think or make more :)
Christmas
Classic fudge
Chocolate cherry rumballs
Classy Caramel Chews
Peppermint mocha cupcakes
Swedish Christmas cookies
Gingerbread
Wednesday, October 26, 2011
Tuesday, August 16, 2011
Raw Food Inspiration: Pineapple "Icecream" Bars
As I waste away the few dwindling days of summer that I have left, I am finding that all of a sudden, I want to make so many different recipes...but I have so little time. School starts on Thursday, and quite frankly, I am not sure what to think. I don't want to underestimate my classes and be shocked when they turn out to be challenging, but I also want to avoid expecting too much and stressing for no reason (I tend to do that fairly often). Naturally, I turned to other activities to distract myself from dwelling too much on my impending year of stress and horrible anxiety. And fun college stuff, too. Totally.
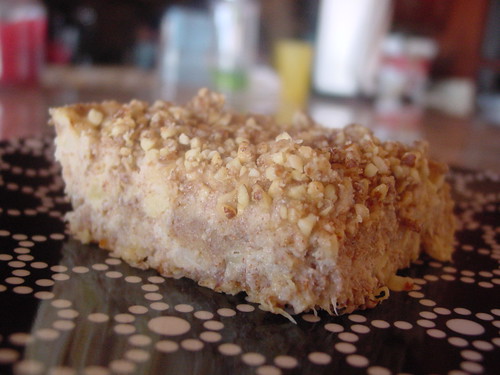
This week, I've hit up the Ross and Target for some new clothes before beginning to the new school year. I found some nice Asian floral shoes, and some sweet shirts at Ross, and I almost got a denim floppy hat that I would've hot glued a sunflower onto (I rocked it when I was 5). But this isn't a fashion blog. This is a cooking blog, so onto the good stuff. I also stopped by Barnes and Noble, as I tend to do if I'm in the area and find myself with an extra stretch of time to waste. Recently, I've been obsessed with reading through their vegan and raw food selections. Several months ago, I made a chocolate cake out of nuts, dates, and some other surprising ingredients. Anyways, my coworker was recently complaining to me that he is going to become obese if I keep bringing sweet things to work. Since I couldn't just stop coming to work (get it? I'm a sweet thing), and it's been so hot lately, I decided to make a healthy, frozen raw food dessert: Ani Phyo's Pineapple Icebox Dessert Bars. I have tweaked the recipe a little, since cashews are so expensive. But it tastes great all the same.

Nutbutter Pineapple Bars
Adapted from Ani Phyo's Pineapple Icebox Dessert
Crust
1 1/2 c almonds
2 T. honey
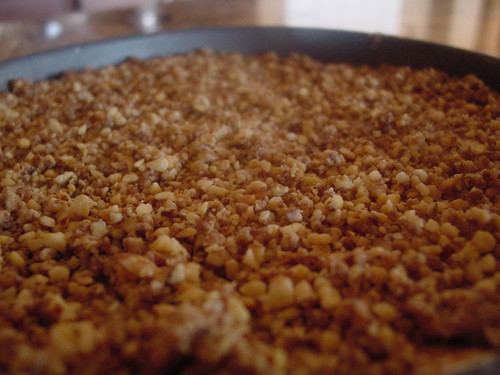
In a food processor, pulse almonds and honey until chopped roughly (it should resemble mealy pie dough).
Spread 2/3 of the crust in the bottom of a cake pan. Reserve the remaining 1/3 crust mixture to sprinkle on the top of the bars as a crumble later.

Filling
2 c crushed pineapple
1 1/2 c raw, unsalted almonds
1/4 liquid coconut oil
1/3 c agave nectar (honey can be substituted)
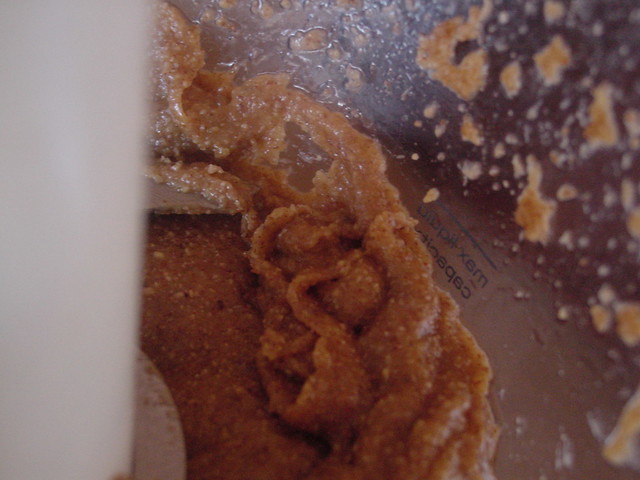
 In the same food processor (the wonderful thing about raw food recipes is that you don't really need to clean things out after using them :)), blend the almonds, coconut oil, and agave nectar until smooth and creamy. You are essentially making almond butter. Your cream mixture will be kind of a muddy brown color if you do use almonds instead of cashews, but if you want the pretty white creamy color that Phyo gets, use blanched almonds (cheaper than cashews), or just fork out the money for cashews. Scoop the nut mixture into a small mixing bowl and fold in pineapple. Pour into the prepared crust and spread over so it covers the pan. Sprinkle remaining crust mixture on top, and freeze until set. Enjoy! :)
What I love most about this is that it only takes about 10-15 minutes to prepare. Quick, healthy, and delicious!

This week, I've hit up the Ross and Target for some new clothes before beginning to the new school year. I found some nice Asian floral shoes, and some sweet shirts at Ross, and I almost got a denim floppy hat that I would've hot glued a sunflower onto (I rocked it when I was 5). But this isn't a fashion blog. This is a cooking blog, so onto the good stuff. I also stopped by Barnes and Noble, as I tend to do if I'm in the area and find myself with an extra stretch of time to waste. Recently, I've been obsessed with reading through their vegan and raw food selections. Several months ago, I made a chocolate cake out of nuts, dates, and some other surprising ingredients. Anyways, my coworker was recently complaining to me that he is going to become obese if I keep bringing sweet things to work. Since I couldn't just stop coming to work (get it? I'm a sweet thing), and it's been so hot lately, I decided to make a healthy, frozen raw food dessert: Ani Phyo's Pineapple Icebox Dessert Bars. I have tweaked the recipe a little, since cashews are so expensive. But it tastes great all the same.
Nutbutter Pineapple Bars
Adapted from Ani Phyo's Pineapple Icebox Dessert
Crust
1 1/2 c almonds
2 T. honey
In a food processor, pulse almonds and honey until chopped roughly (it should resemble mealy pie dough).
Spread 2/3 of the crust in the bottom of a cake pan. Reserve the remaining 1/3 crust mixture to sprinkle on the top of the bars as a crumble later.

Filling
2 c crushed pineapple
1 1/2 c raw, unsalted almonds
1/4 liquid coconut oil
1/3 c agave nectar (honey can be substituted)
What I love most about this is that it only takes about 10-15 minutes to prepare. Quick, healthy, and delicious!
Monday, August 8, 2011
Cherry Cactus Rubies
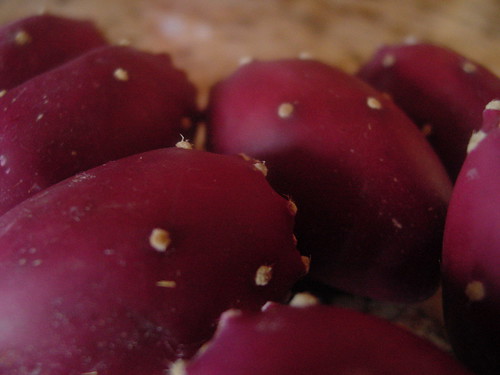
If you live in or have ever visited Arizona or any state in the Southwestern United States, you have most likely seen the flat, broad cacti known as Prickly Pears. Maybe you even went full-tourist and bought some prickly pear candy of your very own just to see how it really feels to live in the Sonoron Desert.
I have.
And I've lived here for 18 years.
I won't kid around, either. Prickly pear jellies are pretty darn good. Typically sold in gas stations and gift shops state-wide, they have an endearing ruby-pink color that no artificial dye could stand up to. And they taste like some sort of freakish mixture between a kiwi, a strawberry, and...something else.
So we've established that many people are familiar with prickly pear candy. And that is good. But how would you like to make your own? Laced with all kinds of lovely flavors like orange, lemon, cherry...the possibilities are endless.
If you're not the candy-making type, then you can always just extract the juice from these succulent (the type of plant they come from is actually called a succulent, by the way) fruits and use it for yet another myriad of ideas: cocktails, salad dressings, shoot - just drink it straight up because prickly pears are pulsating with antioxidants and vitamins A, B, and C.
I will note, however, that if you do not live in an area that has prickly pears sprouting out of the ground loaded with fruit that literally sits there rotting, the fruits can be expensive at the store. Even here in Arizona, where the plants grow in abundance, they tend to go for over a dollar for a single fruit. I blame middlemen and pre-store processing (removing the prickles).
Anyways, I got lucky and got my tunas for free. My stepfather is in Tucson for six weeks, and my family goes to visit him every Sunday. This week in particular, I took special notice of just how many bright red nuggets were sprouting from the cacti which practically grow like grass in the desert regions of Tucson. I told my mom that on our way back down, we should take advantage of how much fruit there was and pick some. I didn't get too many, because my family was impatient, but I got enough to make some lovely little gems.
Cherry Cactus Rubies
 2 cups granulated sugar
2/3 cup prickly pear fruit juice (about 7-10 prickly pear fruits)
1/3 + 1/2 cup cherry juice
1/2 teaspoon each of orange and lemon extracts
2 -1 3/4 oz. packages of fruit pectin
1 1/3 cup organic blue agave nectar
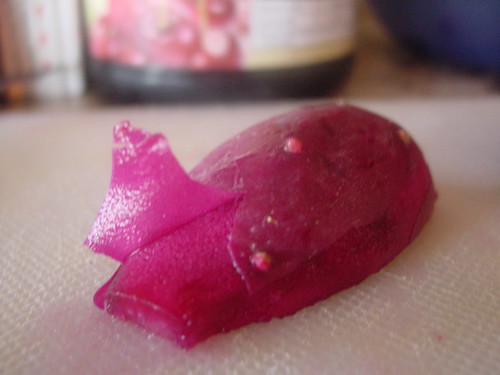
Step 1: The Peeling
Needless to say, prickly pear fruits are prickly. Every website that I visited on how to prepare prickly pear fruits complained that the tiny spines on the fruit hurt so much when they inevitable poke into your fingers unless you wear gloves. I'm not sure what they were talking about, because I didn't have a problem with any cactus fruits shanking my fingers. Then again, they probably haven't played the viola for going on 11 years, either. So if you don't have horrendously calloused man-fingers, you may find it helpful to wear a pair of rubber gloves while you peel your fruit.
Besides that, the process is quite simple:
Slice the ends off, cut the fruit in half vertically, and peel the thin layer of skin off.

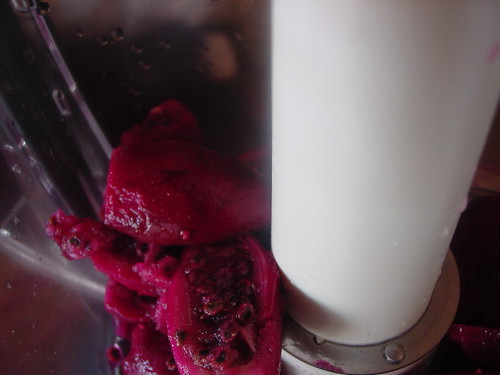
As you peel your fruit, go ahead and drop them into a food processor, seeds and all.
How pretty!
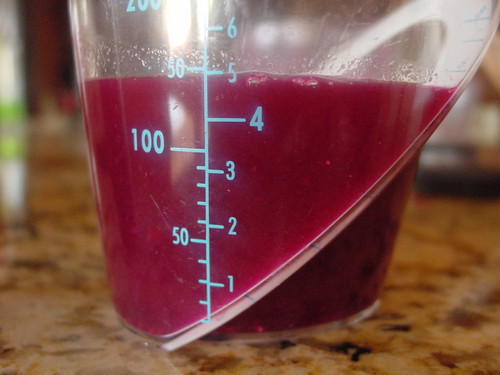
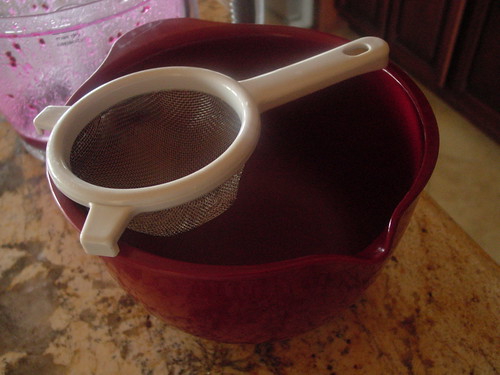
You will then pour your magenta puree through a thin sieve to strain the juice. Press the remaining pulp and seeds into the mesh to release any extra juice that may have been trapped.


Now, the fun begins.
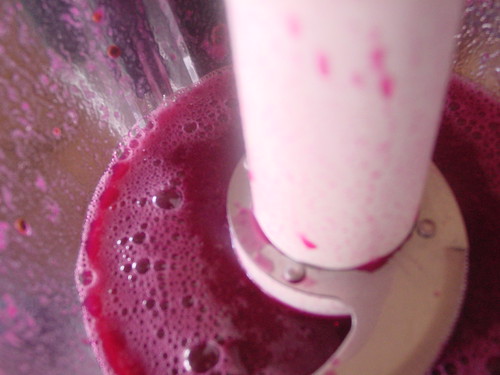
Using a much larger saucepan than I did (I had to transfer my mixtures twice!), whisk together the 2/3 c cactus juice, cherry juice, extracts, and pectin until there are no chunks of pectin. Add the baking soda and prepare for a massive foam party on your stove.
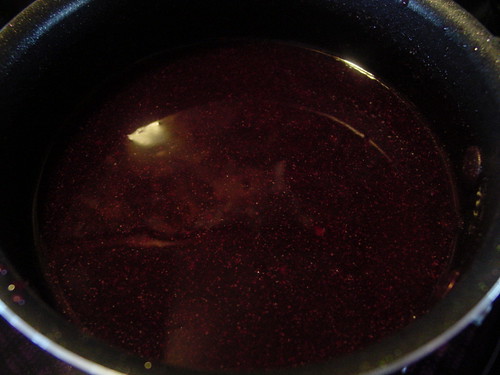
 |
| Here is our Golden Boy! |
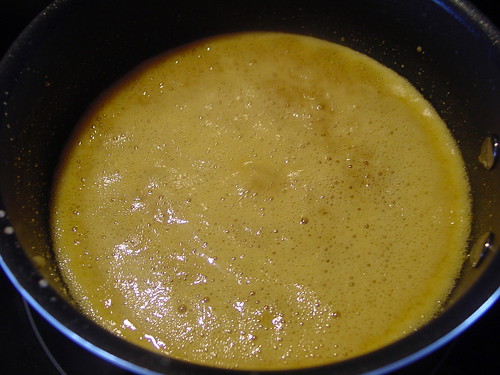
 |
| And his bubbly, blushing lover! (How cheesy am I?) |
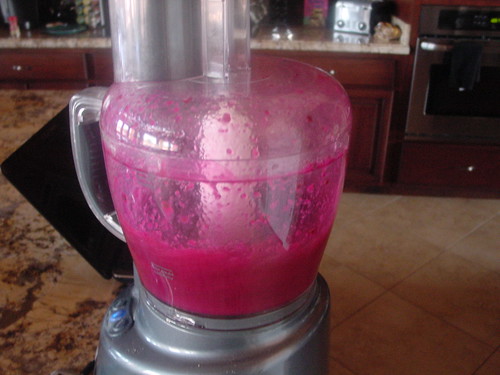
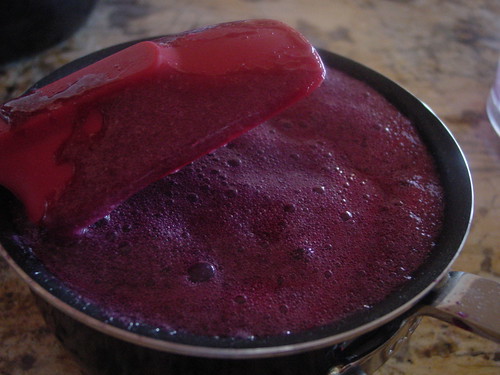
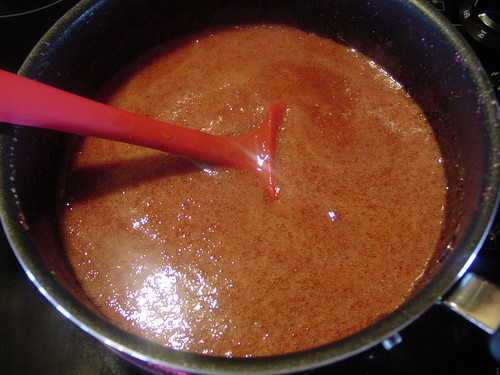 Stir and stir and stir while it boils and watch carefully to be sure it does not boil over, because that would be a very sticky mess. While your juice mixture boils for a bit, combine the sugar and agave nectar and bring to a rolling boil of sweetener. Make sure to boil your sugar mixture in a large pot - one that you would boil noodles in - because once it boils, you will add your juice mixture to it. And, when a super-sweet boy mixture meets a flirtatiously sweet-tart girl mixture, bubbly babies will ensue in your pot. More than a regular sauce pan can handle. I know the picture may not look like much there, but the candy will foam up over the sides of the pot if you let it. Once your lovers are united in holy matrimony (or perhaps something a little less holy), let them cook together a little longer. About 2 minutes. Then remove them from heat, and stir until the mixture becomes clear. Pour this into a greased baking pan or dish. It should be rather shallow and wide to allow you to be able to slice them into reasonable-sized cubes, rather than, say...banana bread-sized slabs of jelliness.
I used a round cake pan.
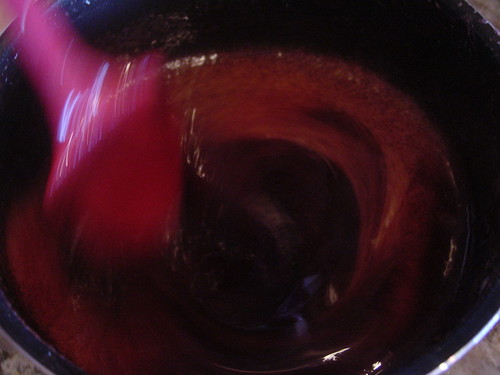 | ||||||
| Psychedelic! |
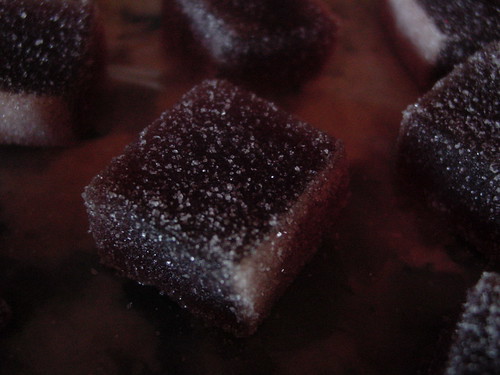
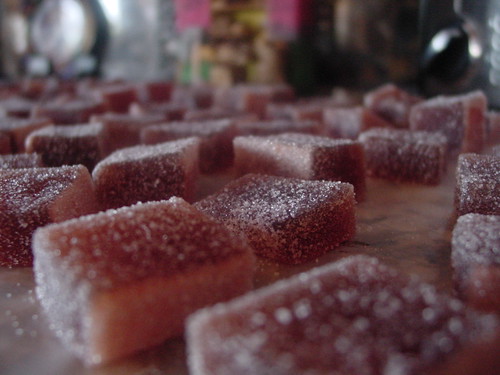
Let the mixture set at room temperature for several hours until it is firm. Once it is ready, flip it over onto a sugared piece of wax paper. Slice into cute little cubes, and dust with powdered or granulated sugar. Store in an air-tight container.
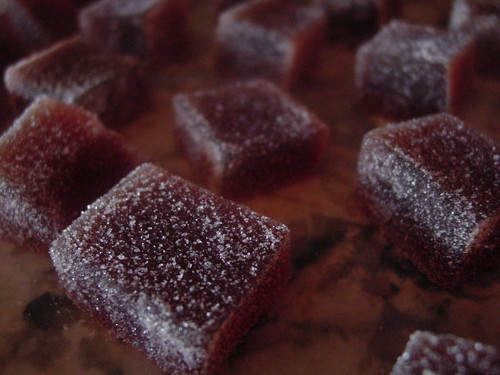 |
| Beautiful, edible gems! :) |
Sunday, April 10, 2011
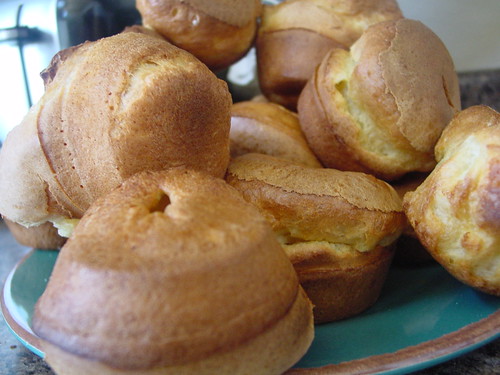
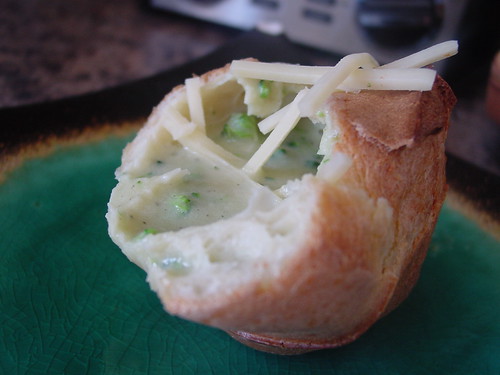
White Cheddar and Broccoli Soup in Popover Bowls
Wow, I was really "cheesy" in high school, huh? ;)
Also, can you believe I've been inconsistently updating this blog since high school? I think I chose the right career, and I think it's time for a blog makeover.
Because this weekend was so strangely chilly, instead of making the Mango Pineapple Sorbet I was planning on (look for it next weekend!), I decided to showcase a nice, warm, homey meal.
This week, I did a lot of cooking, including some Teriyaki Chicken Skewers with Rainbow Stir Fry. Since broccoli was on sale this week for 99 cents a pound, I took advantage and stalked up. I saved the broccoli stalks I had leftover from the florets I used in my stir fry. With the economy and food prices these days, it's really great to use as much of a product as you possibly can. And with fresh produce, you can use very close to everything!
I also made several tasty little quick breads known as popovers. Popovers are extremely easy, cheap, and quick to make, and they are excellent vessels for all sorts of fillings, including chicken or tuna salad, fruit salad, jam, desserts, purees, and even soups! So you must know where I'm going with this...
Pop-On-Over Broccoli and White Cheddar Soup
Clever name, right?
On with the recipes!
Popovers
Preheat oven to 450 degrees fahrenheit. While it's preheating, stick a muffin pan in there to heat up as well. This is an important step to remember!
While your oven is preheating, mix together the following:
 1 cup all-purpose flour, sifted
 1/4 t. salt
Also beat together:
2 eggs
1/2 t. olive oil
Begin combination by gradually (little by little) adding 3/4 c + 2 tablespoons of milk. Add the egg-oil mixture to this batter and beat for 2 minutes. Remove your hot pan from the oven, quickly oil each muffin hole, and immediately pour the batter into your muffin pan. Bake the popovers at 450 degrees for 20 minutes, then lower the temperature to 350 and finish them for another 10 minutes. If you don't plan on serving your popovers immediately, stab them in the top so that the steam inside doesn't make them all soggy and gross.
Now for the star of the show...
Broccoli White Cheddar Soup
3 broccoli stalks, roughly diced.
1 head broccoli florets, coarsely chopped.
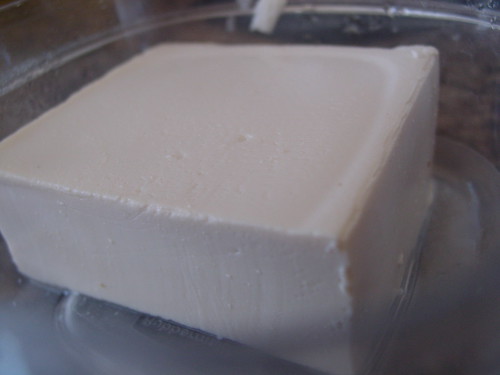
1 block of silken tofu
2 oz. white cheddar cheese (I used sliced, and used about 3 and one more for garnish), cut into thin shreds.
Salt and pepper.
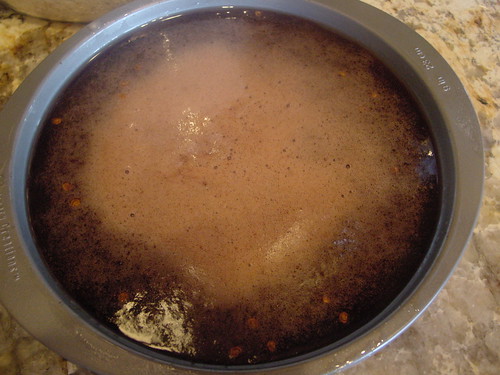
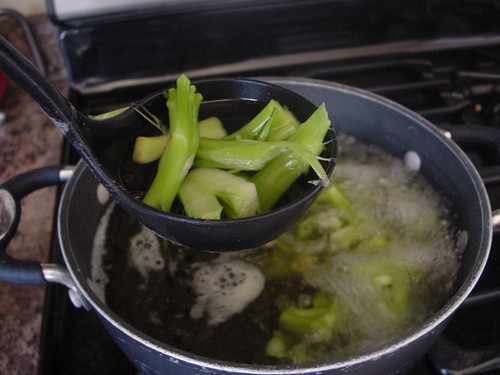 Begin by chopping up your broccoli stalks. Add them to a pot of salt water (add to taste because your broccoli stalks will become broccoli stock) with some whole black peppercorns and bring to a boil. Boil the stalks until they are fork tender, and your water has turned a delicate shade of green.
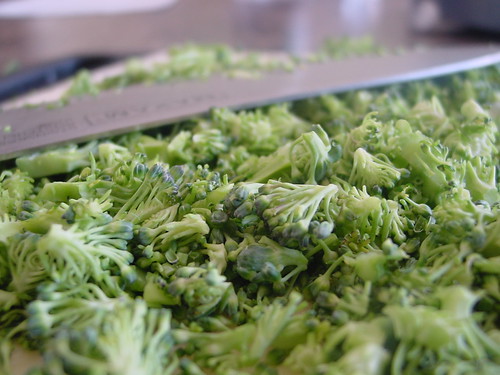
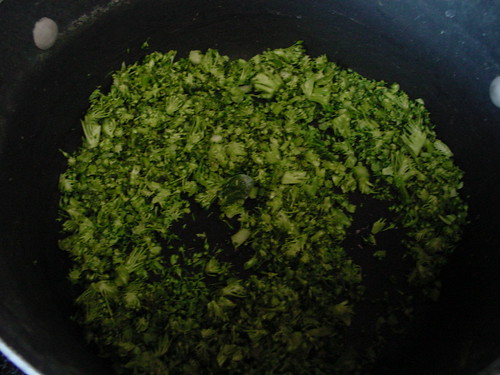
While your stalks are having a spa day, begin chopping up the florets.
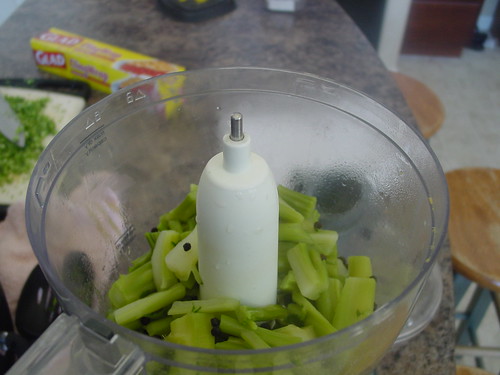 After about 10-12 minutes of boiling, your stalks should be nice and tender and ready to be pureed!
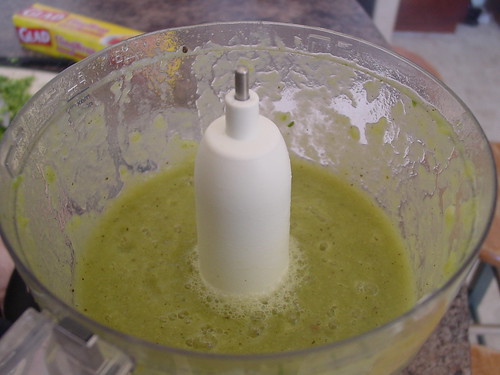
 |
| Hey dudes what is up? |
Anyways, add your 3 oz. of tofu, and blend it into brocolli puree until it's all smooth and creamy. While it's blending, you can either julienne your cheese slices (make sure it's all-natural white cheddar, not like, Kraft American Cheese or something...), shred a block, or, if you bought it pre-shredded...measure it out and add it to the food processor. Continue to add stock until you reach your desired consistency.
Once you have your soup blended to your liking, you can discard or save your remaining broccoli stock. Re-heat the pot while the soup is blending away, and add your broccoli florets, gently sauteeing them until they're just barely cooked. You can also add onions and garlic at this point for a little extra flavor. Next, pour the smooth, creamy, super-broccoli soup back into the pot all over those broccoli florets, and stir it all together.
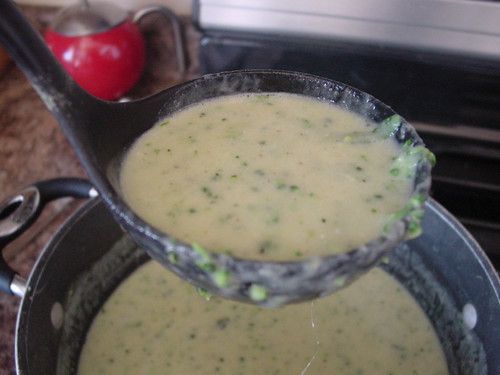
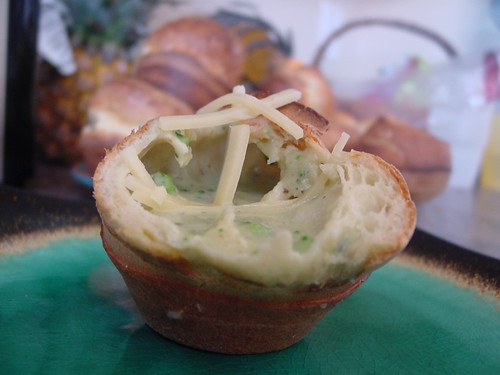
Pop the top off of one of your popovers (just check to make sure there are no holes in the bottom) and pour your creamy, dreamy, green(y) creation right on in there. Top with more shredded cheese for an extra kick.
Sunday, April 3, 2011
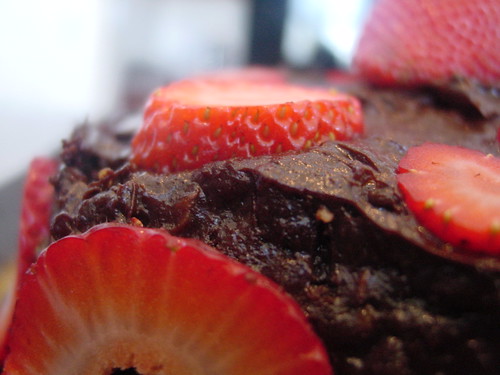
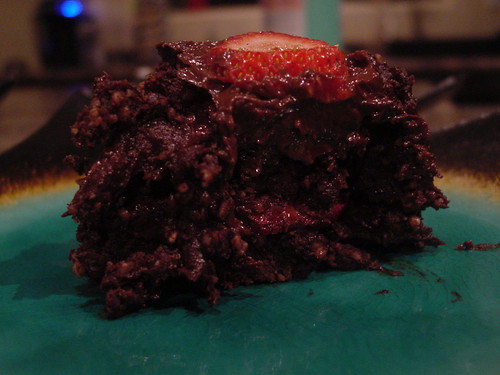
Strawberry Fudge Love Cake (RAW!)
Today, I made a deliciously decadent Strawberry Fudge Love Cake.
I'm very surprised I managed to get a post up two weeks in a row, but here I am! Eating turkey soup and homemade strawberry muffins, and about to shock the (not very massive) masses with a recipe I jacked from a cook book called Ani Phyo's Raw Food Desserts. Lately, I've been trolling around the Barnes and Noble in search of boredom-destruction while waiting to pick my brothers up from school. I was happy to discover this book, and set to taking phone pics of different recipes.
Remember this mouth-watering paramount of chocolate?
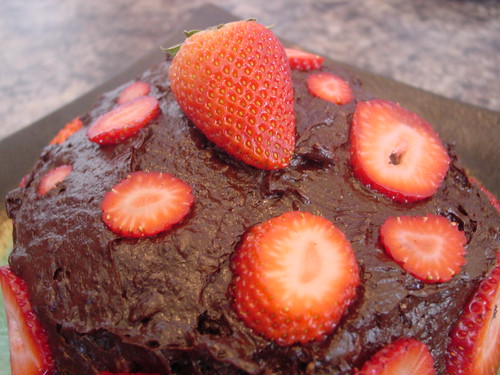
The cake I made is actually called Raspberry Ganache Fudge Cake. However, I tweaked some ingredients by using strawberries because they were on sale, and I used California dates because they were the only ones that Sprouts had available pitted.
Ingredients:
Fudge Cake
3 cups dry walnuts
2⁄3 cup unsweetened cacao powder or carob powder
1⁄4 teaspoon sea salt
1 cup pitted Medjool dates
Frosting
1⁄3 cup semi-soft pitted Medjool dates
1⁄4 cup agave syrup
1⁄2 cup ripe avocado flesh (from about 1 medium avocado)
1⁄3 cup cacao powder
Filling
1⁄2 cup fresh raspberries or strawberries
Simply puree the cake ingredients together in food processor. Then remove the contents and mold into two 6 to 9 inch round cakes. No need to clean the processor for the frosting, because the ingredients are pretty much identical. Go through the same process as for the cake: puree all ingredients until smooth and creamy. Next, frost your cakes, placing sliced strawberries on top of one before layering. Finish frosting, and decorate with fresh fruit as you like. Enjoy :)
That's right. There's an AVOCADO in the frosting. Surprisingly, it works perfectly in place of butter or shortening and cream as a fat. Because of their mild flavor, creamy texture, and inconspicuous color (when mixed with chocolate, anyways), the texture and flavor of the frosting is deceptive. I didn't tell my brothers, because I knew they wouldn't eat it. Although I enjoyed their reactions when I told them afterward.
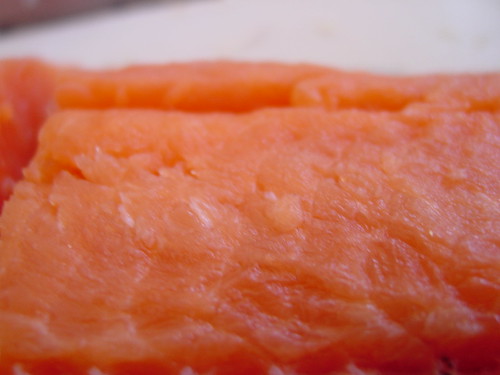
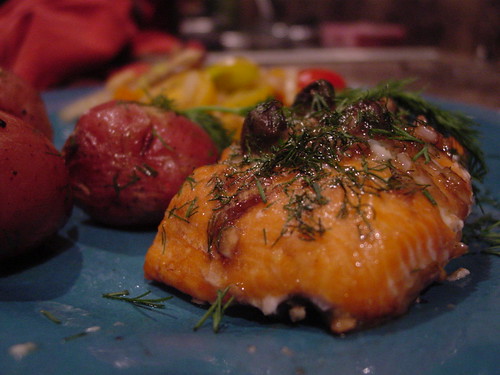
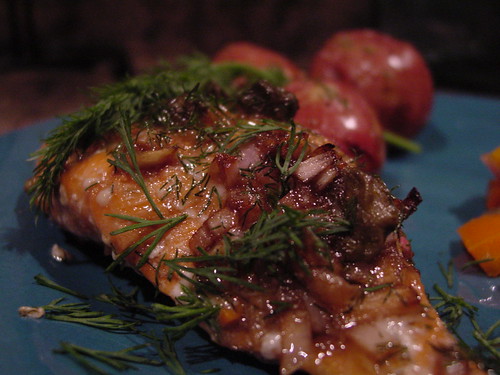
Grilled/Baked Salmon with Tuscany Beans & Heirloom Tomatoes
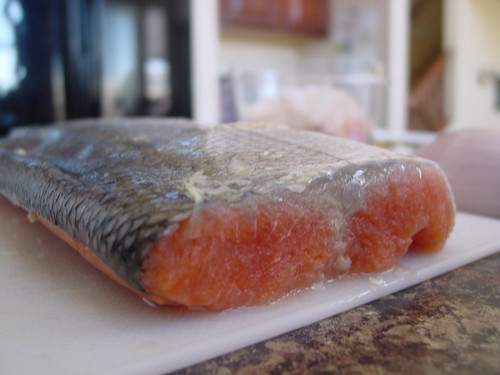 Today's recipe comes from my favorite cooking magazine, Clean Eating. We had a big Coho salmon filet sitting in our freezer, so I decided I'd try this recipe out and defrost it. Also, Sprouts - probably my favorite store of all time - had some lovely, sweet little baby heirloom tomatoes on sale 2 for $5, which was quite a deal considering their regular-sized heirlooms were $3.99 per pound, each of them weighing about a pound! The babies were also a little less ripe than their big mommas and also offered quite a nice variety of colors. :)
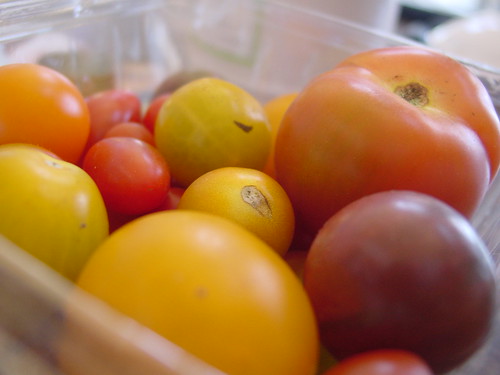 Baked Salmon
Although the original recipe calls for grilling the salmon, which I'm sure would be absolutely delicious, I baked mine because our grill is just so sticky.
Preheat oven to 350 degrees Fahrenheit.
4 4 to 6 oz. salmon filets
1/4 c. extra-virgin olive oil
1/4 c. balsamic vinegar
1 1/2 shallots, minced
4 cloves of garlic, minced
2 oz. capers, drained and rinsed well.
In a bowl, blend oil, vinegar, shallots, garlic, and capers with a whisk. Now it is time to prepare the fish...
My fish had a wonderfundle surprise: bones! If you have ever gone fishing and eaten whatever you managed to catch, you will most likely be familiar with fish and their bones. They are not like human bones, which you can pretty obviously see. No, they are sneaky, and hide deep within the flesh of your dinner! These tiny bones, which are sometimes left in fresh fish filets (say that five times fast) when sold, are called pin bones, and if you don't remove them, they will prick you in the mouth...like a pin. Lucky for my family, I decided to molest my fish a little before marinating it. And found the bones. Because honestly if I had not poked my filets a little, I would have had no idea there were bones left in!
 |
| Those tiny white vein-looking things are really bones. |
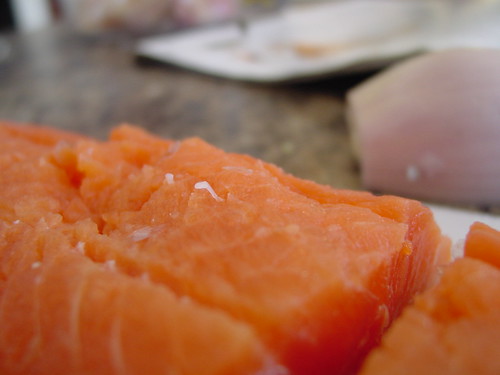 | |
| You can see this bone poking out a little. |
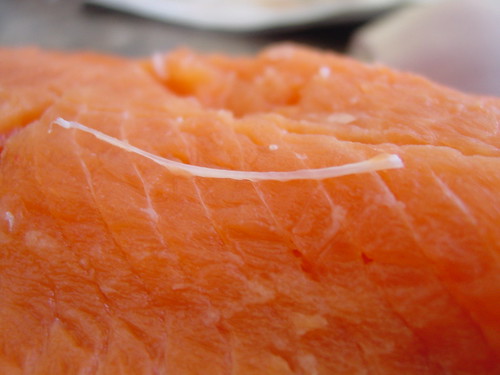 | ||
| One bone. There are many of these little guys in there, so search thoroughly. |
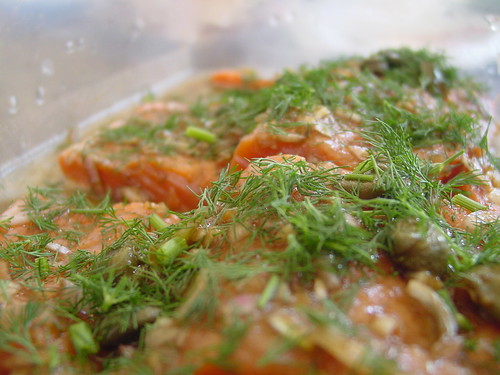 |
| It already looks good, and it's not even cooked yet! |
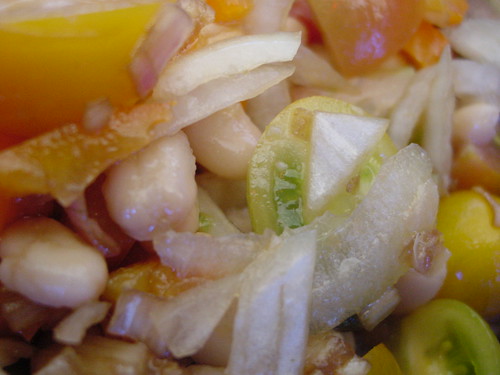
Tuscany Bean Salad
Half recipe of salmon marinade (above)
1/2 onion, THINLY sliced
1 large red or orange bell pepper
1 1/2 packages of baby heirloom tomatoes, or two large regular heirlooms
1 can (15-16oz.) great northern, white kidney, or cannelini beans, drained and rinsed.

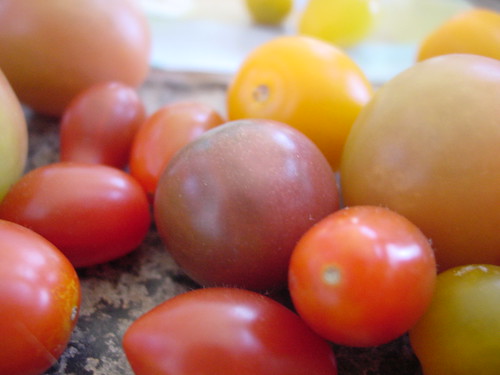 |
| How could you say no to these little cuties? |
Dress the salad with the remaining salmon marinade.
 Some of your little babies (tomatoes) will be very small and not require any slicing, while others will be a bit large and require quartering. Just do what you think will work. Once diced, add them to your salad and gently toss them.
I served my fish and bean salad with some baked baby red potatoes. I stabbed them a little with a fork, then microwaved them until they were fork-tender. We then rolled them in some olive oil, salt, fresh ground pepper, and some fresh dill left over from the salmon recipe. Yum!
Sunday, March 27, 2011
Bacon Spinach Quiche
Alas, my spotty updating seems to be a recurring event here, doesn't it? If only I had a laptop of my very own to use at my heart's desire. Until then, continue to expect consistently inconsistency in my postings :)
Very well, I have had much more time on my hands lately than I have in the past, partly because I have been forced due to economic disabilities to end my swimming career prematurely, and partly because as of late, I haven't really had much homework.
So I've spent much of this time cooking for my family and running in the mountains, where the air is cleaner and the trails are (despite dips and rocks everywhere) much easier on my soft swimmer's joints. Anyways, on to the cooking!
My mom told me this was by far the best quiche she has ever eaten - homemade or restaurant made. I have to say it turned out quite pretty from the oven.

Crust:
I'm going to be honest here. Even with my seemingly endless amounts of time these days, I just don't have the time (or maybe I'm just lazy) to make home-made pie crust. My mom bought pre-made shells from the store. You can do that, or you can be cool and make your own.
 This recipe makes two quiches, so you will need two shells.
Quiche Filling:
16 eggs, beaten.
1/4 water or skim milk
9 oz. (about 9 cups) fresh spinach
1 package (12-16oz.) good quality bacon
About 1 cup shredded cheddar cheese
3/4 onion, diced.
Begin by dicing the bacon into small, 1/4-inch square/rectangle/polygons. Cook in a skillet over medium-low heat until nice and crispy. You may need to drain the fat periodically from the pan so it doesn't get soggy while cooking. In a large mixing bowl, beat eggs until whites and yolks are blended. Add 1/4 cup water (this will give the eggs a fluffier texture and also keep them nice and moist), cheese, and spinach. If you think the spinach leaves take up too much room in your bowl and shell, gently wilt them by steaming them for about 1 minute in the microwave. Allow them to cool before you add them to the eggs. By this time your bacon should be finished cooking. With a slotted spoon, remove the bacon bits and let them drain and cool on a paper towel. Drain the fat from the pan, and saute the onions in the bacon pan until just translucent. Remove from heat and allow to cool. Once all of your hot ingredients are cooled, add them to the egg mixture (if you add them while they are steaming hot, your eggs will CURDLE, your cheese will melt and get GREASY, and you will have a disgusting mess). Bake your quiches in a 350 degree Fahrenheit oven for 35 minutes, or until the crust is nicely browned like a summer beach-goer and the middle of the quiche is firm and set up just like that summer beach-goers browned abdominals. Ok, not that firm. But you get the idea. You don't want to be eating raw eggs.
This quiche does not need salt, because it has bacon in it. Unless you want extra sodium in your diet. But you really shouldn't, because that is unhealthy.
This quiche also pairs wonderfully with pinto beans or black beans! Just pop them in your slow cooker with a hamhock, water or chicken broth, and some salt and other lovely seasonings like pepper, allspice, or chili powder, and allow them to cook throughout the day until nice and tender. You will want to add water as it evaporates so your beans don't dry out.
Very well, I have had much more time on my hands lately than I have in the past, partly because I have been forced due to economic disabilities to end my swimming career prematurely, and partly because as of late, I haven't really had much homework.
So I've spent much of this time cooking for my family and running in the mountains, where the air is cleaner and the trails are (despite dips and rocks everywhere) much easier on my soft swimmer's joints. Anyways, on to the cooking!
My mom told me this was by far the best quiche she has ever eaten - homemade or restaurant made. I have to say it turned out quite pretty from the oven.

Crust:
I'm going to be honest here. Even with my seemingly endless amounts of time these days, I just don't have the time (or maybe I'm just lazy) to make home-made pie crust. My mom bought pre-made shells from the store. You can do that, or you can be cool and make your own.
 This recipe makes two quiches, so you will need two shells.
 Quiche Filling:
16 eggs, beaten.
1/4 water or skim milk
9 oz. (about 9 cups) fresh spinach
1 package (12-16oz.) good quality bacon
About 1 cup shredded cheddar cheese
3/4 onion, diced.
Begin by dicing the bacon into small, 1/4-inch square/rectangle/polygons. Cook in a skillet over medium-low heat until nice and crispy. You may need to drain the fat periodically from the pan so it doesn't get soggy while cooking. In a large mixing bowl, beat eggs until whites and yolks are blended. Add 1/4 cup water (this will give the eggs a fluffier texture and also keep them nice and moist), cheese, and spinach. If you think the spinach leaves take up too much room in your bowl and shell, gently wilt them by steaming them for about 1 minute in the microwave. Allow them to cool before you add them to the eggs. By this time your bacon should be finished cooking. With a slotted spoon, remove the bacon bits and let them drain and cool on a paper towel. Drain the fat from the pan, and saute the onions in the bacon pan until just translucent. Remove from heat and allow to cool. Once all of your hot ingredients are cooled, add them to the egg mixture (if you add them while they are steaming hot, your eggs will CURDLE, your cheese will melt and get GREASY, and you will have a disgusting mess). Bake your quiches in a 350 degree Fahrenheit oven for 35 minutes, or until the crust is nicely browned like a summer beach-goer and the middle of the quiche is firm and set up just like that summer beach-goers browned abdominals. Ok, not that firm. But you get the idea. You don't want to be eating raw eggs.
 |
| My mom made the beans! |
This quiche also pairs wonderfully with pinto beans or black beans! Just pop them in your slow cooker with a hamhock, water or chicken broth, and some salt and other lovely seasonings like pepper, allspice, or chili powder, and allow them to cook throughout the day until nice and tender. You will want to add water as it evaporates so your beans don't dry out.
Sunday, February 20, 2011
Chocolate Fudge Butterfly Truffles

Well, I've certainly failed to deliver in the weekly-basis offerings, haven't I? It's felt like an eternity since I was able to update, and I think it's been about three or four weeks. How sad! Well, this week, since Valentines Day just passed and Easter is around the corner, I'm providing you with a delicious, simple recipe for truffles. Delicious, dense, fudgey chocolate truffles encased in even more rich bittersweet chocolate.
Sounds wonderful, right?
Indeed. And they're even more wonderful when they're done right, which failed to happen when I made this recipe in my culinary class, resulting in the truffles swirling with the outer coating and making a general mess. Not my fault.
So I decided to do them again at home this weekend, and I would do them right, without the time restraints my group had in class. And sans people who don't follow directions. But I won't delve any further.
I'm also making them because my parents took a trip to Nevada this weekend, and I thought I'd make something nice for them to return to. Aren't I just the best daughter ever? ;)
I also dressed my truffles up a bit. The ones we did in class were simply balls coated in chocolate. I decided to sprinkle on some of my pink pearls, chocolate sprinkles, and I made almond-sliver butterflies to top some of the truffles, hence the 'butterfly truffle' name.
 |
| Are those strawberry marshmallows adorable, or what? :D |
- 10 oz. semi-sweet chocolate, chopped finely. (Or you can use chips).
- 1/2 c. heavy cream
- 1 T. corn syrup
- 3 T unsalted butter
Simmer the heavy cream and corn syrup in a sauce pan. Once simmering, pour over the chocolate chips and butter. Let sit for about 3 minutes, then stir gently, so you don't slosh cream and chocolate all over your kitchen.
Here, you can add all sorts of wonderful things to your ganache to make it taste even more fantastic: mint extract, orange extract, amaretto, rum, brandy, coconut extract, or any other flavoring you wish. If you add alcohol, add 1/4 cup and stir in slowly, again, so you don't slosh everything and make a giant mess. Also, the alcohol in the ganache will keep it from freezing solid, so if you store these in the freezer, you can just pull them out and devour them right away instead of waiting for the center to soften.
I didn't add any flavors to mine because I am sharing them with some friends, and I'm not sure if they like chocolate and orange paired together. I do. :)
 |
| Melted wonderfulness. |
After about 1-2 hours, the ganache will be frozen solid (unless you added alcohol, then it will be set and solid)
Remove from freezer and let thaw a few minutes until you can scoop it fairly easily and roll it into small balls about the size of a marble.
*Having a melon baller helps make your balls rounder. I used a spoon, so mine are a little lumpy. But I was able to mold a couple of them into hearts that way :)
Place your rolled ganache orbs onto a parchment-paper lined baking sheet.
When you have finished scooping, put the balls back in the freezer for several hours, or over night.
Coating
 |
| Classy! |
10 oz. bittersweet chocolate, chopped (or chips)
Melt either in a microwave or double boiler.
If you're using a double boiler, just be careful not to get ANY water in the chocolate. A single drop could ruin everything!
It helps if you use a thermometer to make sure your chocolate stays between 92 and 94 degrees fahrenheit. This ensures a hard outer shell for your truffles. I used a meat thermometer, and I'm pretty sure my chocolate was closer to 98 degrees, but my shells were still nice and hard.
If you use a double boiler, remove the pot holding the chocolate from the heating pot once your chocolate is half-way melted. This will ensure it doesn't get too hot.
Now go get your truffle centers from the freezer! Since they will be nicely frozen, they won't melt all over into your coating. You can use an ice cream scoop to scoop up some of the melted chocolate, then drop your truffle center into that and roll it around to coat it without putting it into the actual pot, risking melting.
Place the coated truffles back on the parchment they were frozen on. I discovered that since the pan is still very, very cold, the coatings set up very, very quickly. Therefore, decorate them as soon as you place them on the pan! You can use chopped nuts, sprinkles, cocoa, cinnamon sugar, coconut, or slivered almonds to decorated them. You can roll them completely in the coatings, or you can just sprinkle the coatings on top, like I did.
 | |
| You can see here that the outer shell and inside are distinctly separated! |
Store them in the freezer so that condensation doesn't build up like it would in the refrigerator and drip all over your truffles. When you are ready to serve them, remove them and let them come to room temperature to soften the centers.
I hope you enjoy this recipe, and share it with your friends and family over the next couple of chocolate-filled months. I can guarantee they will love you even more than they already do if you make this for them. :)
Subscribe to:
Posts (Atom)